
Alas, Target is carrying the iPad and it's rumored that Walmart will be next. I don’t mean to be a snob, but I think customers will miss some of the Apple store experience if they purchase the device from one of those two megastores.
I haven’t seen Walmart’s supposed display, but at my local Target, although accessories were in plain view, the iPads themselves were stored in their boxes and locked in a cabinet. No ability to ooh aah or test drive.

But, I understand the demands of marketing to wider audiences. As a favor to those buyers of iPads who go the non-Apple route, and to all of the new iPhone users who may have missed my earlier How-to column, I’m going to repeat some jewels and add a few new tips. A caveat, this column is wholly the opinion of its author; it’s not vetted or endorsed by Apple. Having said that (I love that phrase, but have few chances to use it, so humor me.), here we go:
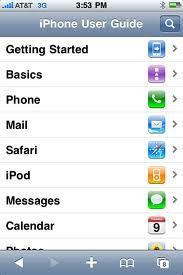
1. Download the User Guide. This works for both the iPhone and iPad. Go to Safari, Apple’s browser. Look for the tiny image that looks like an open book. That’s Safari’s Bookmark. Click on that and on the option menu you’ll see User Guide. Next, hit the plus () sign. When asked what you want to do with this page, select Add to Home Screen. Voilà, the guide is now on your Home Screen where you can refer to it as needed.

2. Safari’s plus and Home Screen trick works for any other web sites you’d like downloaded. Let’s say you’re reading this blog on either Apple device and you want to save it for later reading, or you want to do the same for my website, Elaine Soloway Public Relations. Hit the plus sign and down either site will go to your Home Screen. No need to go back to your browser, I’ll, um, I mean “they” will pop up with one touch.

3. This is a frequent question asked by iPhone users. How do I upload photos to Facebook? Take the photo with your iPhone camera, and save it in your Camera Roll. Then, open Facebook (let’s assume you’ve already downloaded the app and have kept it updated), and look for the little camera to the left of the horizontal space called, What’s on your mind? (Don’t write anything in that space.) After you’ve clicked on that tiny camera and you are given the option of Take Photo or Video, or Choose From Library, select the latter. When the desired photo appears, add a caption, upload, and it will soon appear on your Facebook page.

4. This works for the iPhone and iPad. When writing text on an email, and you’ve made an error in the middle of a word, it’s not necessary to use the “x” to go backwards and erase all you’ve already written. Simply place your finger on the error (think of your finger as a cursor) and a magnifying glass will appear. Guide the cursor to the spot and make the correction. Now move your finger/cursor back to the end of the line to complete your email.
5. This is another text tip. If you want to make some of letters on your iPhone accented, tap the letter, pause, and a trio of accented letters appears. Select your choice and it will be in the text. (Thanks to friend Frances Archer for reminding me of this trick.)
If I haven’t answered your questions, here’s an idea: check out the User Guide. You’ll find it on your Home Screen.